The clutch is a vital component of your vehicle’s transmission system, playing a crucial role in engaging and disengaging the engine from the drivetrain. Over time, like any mechanical part, the clutch can experience wear that may affect its performance and, consequently, your driving experience. Understanding how to inspect and replace your clutch can save you both time and money, ensuring that your vehicle operates smoothly.
Recognizing the signs of clutch wear early can help prevent more severe damage to your vehicle. Common symptoms include slipping gears, difficulty in shifting, and unusual noises when the clutch is engaged. Regular inspections are essential in identifying these issues before they escalate, allowing for timely maintenance or replacement. This guide will walk you through the steps of inspecting your clutch, determining when it needs to be replaced, and providing the essential knowledge to tackle the replacement process efficiently.
Equipped with the right tools and a clear understanding of your vehicle’s mechanics, you can take control of your clutch maintenance. This guide aims to empower you with the knowledge needed to prolong the life of your vehicle’s transmission and enhance your overall driving experience.
Identifying Symptoms of Clutch Wear and Failure
Recognizing the early indicators of clutch wear and failure is crucial for maintaining the overall health of your vehicle’s transmission system. Ignoring these signs can lead to more significant issues and costly repairs. Here are some common symptoms to watch for:
- Slipping Clutch: If you notice the engine revving higher without a corresponding increase in speed, this may indicate that the clutch is slipping. This condition often arises from wear of the friction materials.
- Difficulty Shifting Gears: Struggling to shift into gear or experiencing grinding noises can signal that the clutch is not fully engaging. This failure can occur due to the hydraulic system, misalignment, or wear of the clutch components.
- Pedal Feel Changes: An unusually soft or stiff clutch pedal can indicate wear in the linkage or a problem with the master/slave cylinder in the hydraulic system. This change in pedal feel may also point to issues with the clutch disc.
- Unusual Noises: Listening for unexpected sounds like rattling, squealing, or buzzing when the clutch is engaged or disengaged could suggest wear or damage to the clutch assembly.
- Delayed Engagement: If there’s a noticeable delay when you release the clutch pedal before the vehicle begins to move, it might be a sign of clutch wear or issues within the transmission system.
Being proactive and addressing these symptoms early can prevent further damage and ensure your vehicle remains reliable. Regular inspections and maintenance of the clutch system can help identify issues before they escalate.
Step-by-Step Process for Clutch Inspection

Performing a thorough inspection of your vehicle’s clutch system is essential for identifying wear and ensuring optimal performance. Follow these steps to effectively evaluate the condition of your clutch.
Step 1: Gather Tools and Materials
Before starting the inspection, gather necessary tools such as a jack, jack stands, a wrench set, and a flashlight. Having these items on hand will streamline the process and ensure safety.
Step 2: Safely Lift the Vehicle
Use a jack to lift the front or rear of the vehicle, depending on the access needed. Secure the vehicle with jack stands to ensure stability during inspection.
Step 3: Inspect the Clutch Pedal
Begin by checking the clutch pedal for free play and resistance. Press the pedal down and observe if it springs back smoothly. Any irregularities may indicate wear in the clutch components.
Step 4: Examine the Clutch Fluid
If your vehicle has a hydraulic clutch system, inspect the fluid level and condition. Low fluid levels or dirty fluid can cause clutch performance issues. Top it up or replace it as needed.
Step 5: Check for Leaks
Look for signs of fluid leaks around the master and slave cylinders. Leaks can lead to a loss of pressure, affecting the clutch’s functionality. Address any leaks promptly.
Step 6: Inspect the Clutch Plates
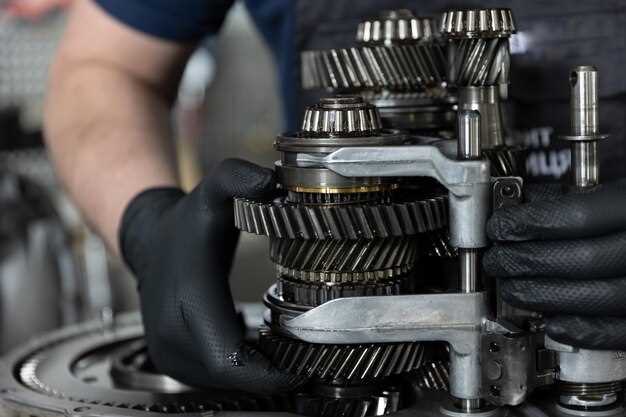
Remove the transmission case to access the clutch assembly. Inspect the clutch plates for signs of wear, such as discoloration, scoring, or excessive material thinning. These signs indicate that replacement may be necessary.
Step 7: Assess the Release Bearing
Check the release bearing for smooth operation and any signs of wear or damage. A faulty bearing can lead to premature clutch failure, so it’s essential to address it during inspection.
Step 8: Test Engagement and Disengagement
While the vehicle is still lifted, start the engine and engage the clutch. Listen for any unusual noises and observe the engagement point. If there are issues, further investigation is warranted.
Step 9: Document Findings
Record all observations noted during the inspection. This documentation will help track the clutch’s condition over time and assist in decision-making regarding repairs or replacements.
Following this step-by-step process for clutch inspection allows you to identify potential problems early and maintain your vehicle’s performance by addressing wear effectively.
Guidelines for Choosing and Installing a New Clutch

When selecting a new clutch, it’s essential to consider the specific needs of your vehicle’s system. Start by researching the type of clutch that best suits your car’s engine and transmission specifications. Factors such as engine power and driving style significantly influence your choice.
Consider the material and construction of the clutch components. High-quality materials, like organic or ceramic options, can provide better performance and durability. Additionally, pay attention to the manufacturer’s recommendations to ensure compatibility and avoid premature wear.
Once you have selected the appropriate clutch, the installation process is critical for optimal operation. Begin by thoroughly inspecting surrounding parts, including the flywheel and release bearing, to identify any signs of wear. Proper cleaning and preparation of these components can enhance the lifespan of your new clutch.
During installation, ensure that you follow the manufacturer’s guidelines closely. Use the recommended torque specifications when tightening bolts to prevent uneven pressure that can lead to failures. Additionally, carefully align the clutch disc and pressure plate to avoid misalignment, which can cause slippage and further wear.
After installation, it is advisable to perform a break-in period. Gradual application of throttle during this period allows the clutch surfaces to properly mate, reducing the risk of premature wear and ensuring reliable performance.
