

Maintaining the braking system of your vehicle is crucial for your safety on the road. Among the various components that require regular attention, brake fluid plays a vital role in ensuring optimal performance. Choosing the right fluid and knowing when to replace it can significantly impact your vehicle’s braking efficiency and lifespan.
Brake fluid is designed to transfer force from the brake pedal to the brake components, allowing for effective deceleration and stopping. However, brake fluid can absorb moisture over time, which can lead to decreased boiling points, increased corrosion, and ultimately, brake failure. Proper maintenance involves not only selecting the correct fluid but also understanding the signs that indicate it’s time for a replacement.
In this guide, we will explore the different types of brake fluids available, their specifications, and how to correctly replace them. By following these guidelines, you can ensure your vehicle’s braking system remains in top condition, enhancing your driving experience and keeping you safe on the road.
Identifying the Right Brake Fluid Type for Your Vehicle

Choosing the correct brake fluid is crucial for proper maintenance and optimal performance of your vehicle’s braking system. Brake fluids are categorized primarily by their chemical composition and performance characteristics, which are essential for safe and effective braking.
There are three main types of brake fluid: DOT 3, DOT 4, and DOT 5.1, with DOT 3 and DOT 4 being glycol-based fluids, while DOT 5 is a silicone-based fluid. The first step in identifying the right type for your vehicle is to consult the owner’s manual, which provides specific recommendations based on manufacturer guidelines. Using the incorrect fluid can compromise braking efficiency and potentially damage the braking system.
Each fluid type has different boiling points and moisture absorption rates, affecting their performance under varying conditions. For instance, DOT 4 fluids usually have a higher boiling point than DOT 3, making them more suitable for vehicles used in high-performance environments or under heavy loads. Additionally, be aware that switching between glycol-based fluids and silicone-based fluids is not advised, as they are not compatible.
It’s also important to check for any certifications or specifications on the fluid container that meet the SAE or ISO standards, which ensures that the fluid has been tested for quality and safety. Regular maintenance includes checking brake fluid levels and condition, as old or contaminated fluid can lead to brake failure. Always remember that safety is paramount; thus, choosing the right brake fluid and adhering to maintenance schedules will prolong the lifespan of your braking system and ensure reliable vehicle operation.
Step-by-Step Process for Replacing Brake Fluid
Replacing brake fluid is a critical part of vehicle maintenance that ensures effective braking performance. Follow these steps to replace the fluid correctly.
Step 1: Gather Your Tools and Materials
Before you start, collect all necessary tools including a wrench, a brake fluid reservoir, and fresh brake fluid suitable for your vehicle (e.g., DOT 3, DOT 4, or DOT 5.1). You should also have a clean container for old fluid disposal and a mechanic’s syringe or fluid bleeder if available.
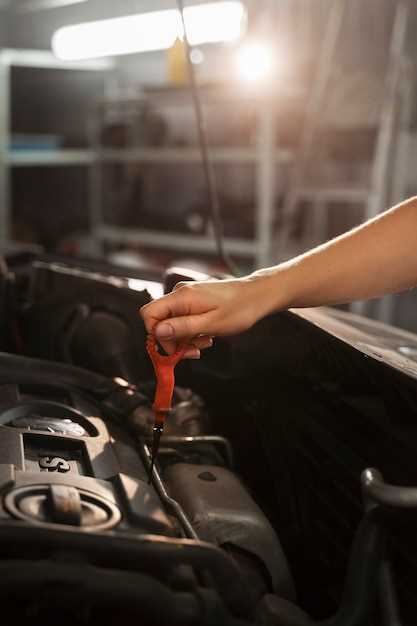
Step 2: Locate the Brake Fluid Reservoir
Find the brake fluid reservoir under the hood of your vehicle. It is usually located near the back of the engine bay, on the driver’s side. Check the fluid level and condition; cloudy or discolored fluid indicates it’s time for replacement.
Step 3: Remove Old Fluid
Use the syringe or a baster to extract old brake fluid from the reservoir. Dispose of it properly. This step helps in decreasing the amount of dirty fluid that would mix with the new fluid.
Step 4: Fill with New Brake Fluid
Pour the new brake fluid into the reservoir until it reaches the recommended fill line. Avoid overfilling, as this may cause spillage when you bleed the brakes.
Step 5: Start Bleeding the Brakes
Begin the process at the furthest brake from the master cylinder, typically the passenger-side rear. Use a wrench to loosen the bleeder valve slightly. Have an assistant press the brake pedal slowly and firmly. As they push the pedal down, open the valve and watch for old fluid and air bubbles to flow out. Close the valve before your assistant releases the pedal. Repeat this process until clear, new fluid flows out, ensuring to refill the reservoir as needed.
Step 6: Move to Remaining Brakes
Repeat the bleeding process on each brake in the following order: driver’s side rear, passenger-side front, and finally driver’s side front. This order helps ensure that air is properly purged from the system.
Step 7: Check Fluid Level
After bleeding all four brakes, inspect the fluid level in the reservoir once more and top it off if necessary. Ensure everything is within the marked lines.
Step 8: Clean Up and Test
Wipe any spilled brake fluid from surfaces as it can damage paint. Dispose of the old fluid according to local regulations. Finally, take the vehicle for a short test drive to ensure the brakes function properly and check for any leaks.
Regular maintenance of brake fluid is essential for safety and vehicle performance. Following this step-by-step process will help keep your braking system in optimal condition.
Regular Maintenance Tips for Brake Fluid and System Health
Regular maintenance of brake fluid is essential for the overall health of your vehicle’s braking system. Begin by checking the brake fluid level monthly. Ensure that it remains within the recommended range on the reservoir. If the fluid level is low, it may indicate a leak or worn brake components, necessitating further inspection.
Next, inspect the brake fluid’s condition. Brake fluid should be clear or light amber. If it appears dark or cloudy, it may have absorbed moisture and should be flushed. Contaminated fluid can diminish braking performance and lead to corrosion within the brake system.
It is recommended to replace brake fluid every two years or as dictated by the vehicle manufacturer. This helps to ensure that moisture levels remain low, maintaining the effectiveness of the hydraulic system. Always use the correct type of brake fluid specified in your owner’s manual to avoid potential damage to the braking components.
Additionally, monitor the condition of brake components, such as pads and rotors. Worn-out parts can lead to increased brake fluid temperature and degrade fluid quality. Routine inspections and timely replacements are vital to maintain system integrity and performance.
Lastly, be aware of any changes in braking performance, such as spongy brakes or strange noises. These symptoms may indicate issues within the brake system that require immediate attention. Regular maintenance checks can prevent minor issues from escalating into significant safety concerns.