

Fuel injectors are a critical component of any modern internal combustion engine, playing a vital role in delivering the precise amount of fuel needed for optimal performance. Over time, these injectors can become clogged or malfunction, leading to decreased fuel efficiency, rough idling, and increased emissions. Replacing faulty fuel injectors is essential for maintaining your vehicle’s overall health and ensuring smooth operation.
In this comprehensive guide, we will walk you through the step-by-step process of replacing fuel injectors, providing you with the necessary tools, tips, and techniques to perform the job safely and effectively. Whether you are an experienced mechanic or a DIY enthusiast, understanding the proper methods for injector replacement will empower you to tackle this essential maintenance task.
From gathering the right tools to reinstalling the new fuel injectors, each step is crucial in ensuring a successful replacement. Pay close attention to the details outlined in this guide, as precision and care will make a significant difference in your vehicle’s performance post-replacement.
Identifying Signs of Vacuum Leaks and Poor Performance
Vacuum leaks can significantly impact the performance of your vehicle’s engine, leading to poor fuel efficiency and rough idling. One of the most noticeable signs of a vacuum leak is a high or erratic idle. If your engine idles at an unusually high RPM or fluctuates, it may indicate unmetered air entering the system. This disrupts the air-fuel mixture, causing the engine to run lean.
Another common symptom is a decrease in acceleration and overall power. When a vacuum leak occurs, the engine may struggle to take in and process fuel correctly. Consequently, you’ll experience sluggish performance when attempting to accelerate, particularly during highway merging or overtaking.
These leaks can also cause increased emissions. A vehicle with a vacuum leak often registers higher levels of pollutants due to improper combustion ratios. If your exhaust contains more emissions than usual, it may be time to investigate potential vacuum leaks.
Listen for abnormal sounds as well. A hissing or whistling noise from the engine bay could signify air escaping from a vacuum line or intake manifold. This sound is typically a clear indicator that there’s a leak in the system.
Pay attention to trouble codes as well. Using an OBD-II scanner can reveal error codes related to fuel mixture problems, such as P0171 or P0174. These codes signal that the engine control module has detected a lean condition in the air-fuel mixture, often caused by vacuum leaks.
Finally, performing a visual inspection of vacuum hoses can help to identify any damaged, cracked, or disconnected lines. Replacing these faulty hoses may improve performance and restore proper fuel flow. Regular maintenance and checks can prevent issues related to vacuum leaks, ensuring your fuel system operates efficiently.
Tools and Parts Needed for Fuel Injector Replacement
To successfully perform a fuel injector replacement, it is essential to gather the right tools and parts. This ensures the process goes smoothly and reduces the risk of complications.
Tools Required:
- Socket Set: A set of sockets, including deep sockets, will help you remove any screws or bolts holding the fuel rail and injectors in place.
- Wrench Set: Open-end and box-end wrenches are necessary for various fittings and hard-to-reach areas.
- Screwdriver Set: Flathead and Phillips screwdrivers may be needed to remove clips or covers.
- Torque Wrench: A torque wrench is vital to ensure that bolts are tightened to the manufacturer’s specified settings, preventing leaks or damage.
- Fuel Line Disconnect Tool: This specialized tool will make it easier to disconnect fuel lines without causing damage.
- Pliers: Needle-nose pliers can be useful for gripping and manipulating small components.
- Safety Goggles and Gloves: These protective items are essential to ensure your safety while handling fuel and sharp tools.
Parts Required:
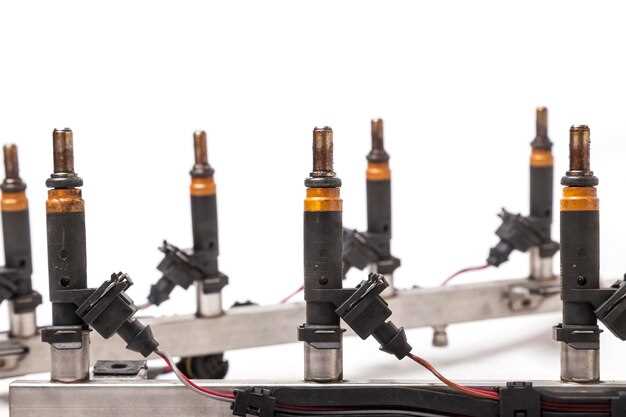
- New Fuel Injectors: Ensure you have the correct replacement injectors compatible with your vehicle model.
- New O-rings: O-rings are crucial for a proper seal and should be replaced to prevent fuel leaks.
- New Fuel Filter: Replacing the fuel filter during injector replacement is advisable, as it can help maintain system efficiency.
- Fuel System Cleaner: This can be applied after replacement to clean any deposits in the fuel system.
Having all the necessary tools and parts on hand before starting the replacement will streamline the process and contribute to a successful outcome.
Step-by-Step Procedure for Removing and Installing Fuel Injectors
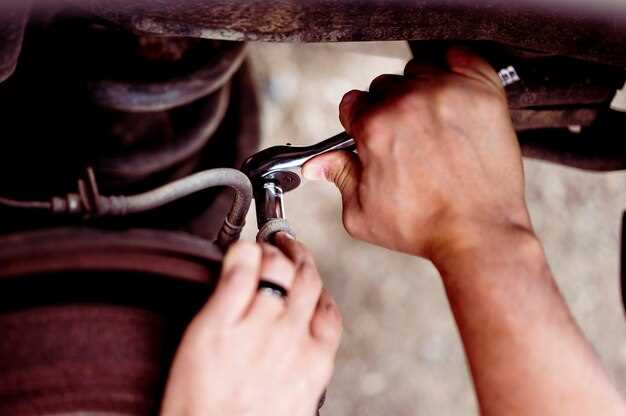
Begin by disconnecting the vehicle’s battery to ensure safety while working on the fuel system. Remove the negative terminal to prevent any electrical issues during the injector replacement process.
Locate the fuel injector rail, which is typically situated near the engine. Carefully disconnect the electrical connectors attached to each injector. Use a flathead screwdriver if necessary to release any locking tabs, taking care not to damage the connectors.
Next, relieve the fuel pressure in the system. This can often be done by locating and removing the fuel pump fuse or relay and cranking the engine for a few seconds until it stalls. Alternatively, you can use a fuel pressure gauge to safely release the pressure.
Once the fuel pressure is relieved, locate the bolts securing the fuel rail to the intake manifold. Remove these bolts using the appropriate socket or wrench. Carefully lift the fuel rail from the manifold, ensuring that the injectors remain attached to the rail.
Gently pull each injector from the rail. If the injectors are stuck, use a twisting motion to break the seal but avoid using excessive force. Inspect the old injectors for any signs of damage or wear, which may indicate the need for replacement.
Before installing the new injectors, apply a small amount of engine oil to the O-rings on each injector to ensure a proper seal and prevent damage during installation. Carefully insert each new injector into the fuel rail until it is fully seated.
Reattach the fuel rail to the intake manifold, ensuring that all injectors are properly aligned with their respective ports. Tighten the mounting bolts to the manufacturer’s specified torque.
Reconnect the electrical connectors to each fuel injector, ensuring they click into place securely. Make sure there are no loose connections that could impact performance.
Reinstall the fuel pump fuse or relay to restore power to the system. Reconnect the vehicle’s battery, starting with the positive terminal followed by the negative terminal.
Finally, turn the ignition key to the “On” position without starting the engine. This will prime the fuel system and allow you to check for any leaks around the injectors. If no leaks are present, start the engine and let it idle while monitoring for smooth operation.