

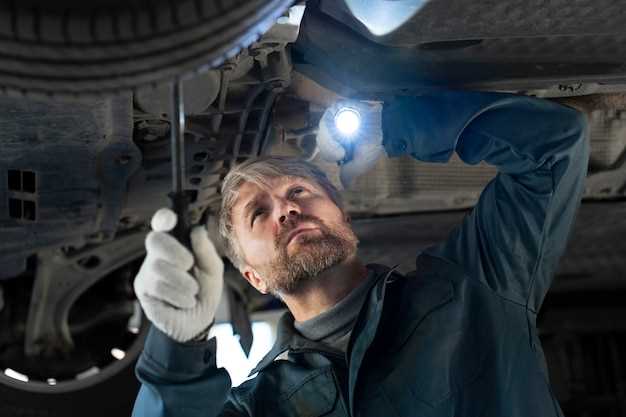
Replacing your car’s headlights is an essential task that many drivers overlook. Ensuring your headlights are functioning properly is crucial not only for your visibility while driving at night but also for the safety of others on the road. As part of your vehicle’s electrical system, headlights play a vital role in illumination and signaling, making their maintenance necessary for optimal performance.
When planning to replace your headlights, it is important to follow a set of safe steps to avoid any mishaps during the process. This undertaking requires not only basic mechanical knowledge but also a clear understanding of the electrical components involved. A systematic approach in handling these parts minimizes the risk of damaging the vehicle’s electrical system or compromising safety.
This article will guide you through each step of safely replacing your car headlights, ensuring you are well-prepared for this maintenance task. From gathering the necessary tools to understanding the specific type of bulbs compatible with your vehicle, you’ll find all the information you need to complete this job successfully.
Identifying the Right Headlight Bulb for Your Vehicle

Choosing the correct headlight bulb is essential for ensuring optimal visibility and safety on the road. To begin, consult your vehicle’s owner manual, which typically includes information about the specific bulb type compatible with your headlights. This reference is crucial as different vehicles utilize various electrical systems, requiring distinct bulb specifications.
Common Types of Headlight Bulbs
Headlight bulbs generally fall into three main categories: halogen, HID (High-Intensity Discharge), and LED (Light Emitting Diode). Halogen bulbs, known for their affordability, provide decent illumination but have a shorter lifespan compared to HID and LED options. HID lights are brighter and more energy-efficient, making them a popular choice for many modern vehicles. LED bulbs offer longevity and enhanced visibility, though they may have a higher upfront cost.
Checking Compatibility
Once you identify the type of bulb your vehicle requires, verify its compatibility by checking the bulb’s socket size. This is typically represented by a code, such as H1, H4, or 9006. Ensure that any replacement bulb matches not only the type but also the electronic specifications to avoid electrical issues.
Brightness and Color Temperature
When selecting a bulb, consider its brightness and color temperature. Brightness is measured in lumens; higher lumens result in brighter light. Color temperature, measured in Kelvin, affects the light’s hue. A color temperature around 3000K gives off a warm yellow light, while 5000K and above produces a cooler, whiter light. Choose a brightness and color that suits your driving conditions and personal preference.
Research and Reviews
Before making a purchase, it’s wise to conduct research and read reviews on specific bulb models. User experiences can provide insights into performance, longevity, and overall satisfaction. Reputable brands often offer more reliable products, which can enhance the overall safety of your driving experience.
By carefully considering these factors, you can confidently identify the right headlight bulb for your vehicle, ensuring efficient electrical performance and improved visibility on the road.
Properly Disconnecting Your Car’s Battery Before Replacement
Before replacing your car’s headlights, it is crucial to ensure safety by disconnecting the battery. This step prevents any electrical surges or potential short circuits while working on the lighting system. Start by locating the battery, which is usually found under the hood of the vehicle.
Once you have access to the battery, identify the negative terminal, which is typically marked with a minus sign (-) and often covered in black. Use an appropriate wrench to carefully loosen the clamp on the negative terminal. After loosening, gently pull the cable away from the terminal to fully disconnect it. This action eliminates the risk of accidental electrical discharges while you handle the headlights and associated components.
Only after ensuring the negative terminal is completely disconnected should you proceed to replace the headlights. If your car has a complex electrical system, consider also disconnecting the positive terminal for added safety. Remember to reattach the earth cable after completing your work, ensuring a secure connection for the vehicle’s electrical system.
Step-by-Step Guide to Installing New Headlight Bulbs
Replacing your car’s headlights is a straightforward process that can enhance visibility on the road. Follow these steps to install new headlight bulbs effectively.
Step 1: Gather Required Tools and Materials
Before starting, ensure you have the new headlight bulbs suitable for your vehicle model, a screwdriver, and gloves to avoid touching the glass of the bulbs.
Step 2: Open the Hood
To access the headlight assembly, open your car’s hood and secure it with a prop rod if necessary. Make sure the vehicle is turned off and cooled down to prevent burns.
Step 3: Locate the Headlight Assembly
Identify the headlight assembly, typically located at the front of your vehicle. Consult your owner’s manual if you have trouble finding it.
Step 4: Remove the Headlight Assembly Cover
Depending on your car’s system, you may need to unscrew or unclip the assembly cover. Carefully remove it to expose the headlight bulb.
Step 5: Disconnect the Power Connector
Gently disconnect the power connector attached to the back of the old headlight bulb. Press the release tab and pull it out without forcing it.
Step 6: Remove the Old Bulb
Twist the old bulb counterclockwise to release it from the socket. Handle the bulb by its base to avoid any damage.
Step 7: Install the New Bulb
Take the new bulb and insert it into the socket. Make sure it is secured by twisting it clockwise. Avoid touching the glass part of the bulb to prevent residue build-up.
Step 8: Reconnect the Power Connector
Attach the power connector to the back of the new bulb. Ensure it clicks into place to establish a secure connection.
Step 9: Replace the Assembly Cover
Put the headlight assembly cover back on, ensuring it is secured properly. This protects the bulbs from dirt and moisture.
Step 10: Test the New Headlights
Before closing the hood, turn on your vehicle and test the new headlights to confirm they are functioning properly. Check both low and high beams, if applicable.
Step 11: Close the Hood
Once you’ve verified that the headlights operate correctly, close the hood securely. Your new headlights are now ready for use!