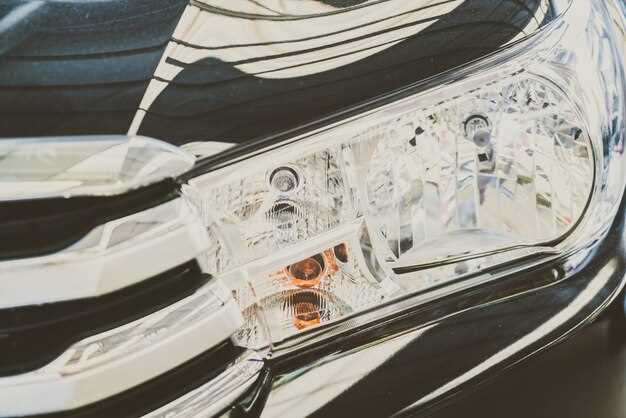
In recent years, LED lights have emerged as a superior lighting option for vehicles, offering numerous advantages over traditional halogen bulbs. Their efficiency, durability, and brightness make them an excellent choice for vehicle owners looking to enhance visibility and safety on the road.
Upgrading your vehicle to LED lights is not just about aesthetics; it also contributes to better energy efficiency, resulting in less strain on your vehicle’s electrical system. This means longer-lasting performance and less frequent replacements, translating into cost savings over time.
Moreover, LED lights provide a crisp, clear light that improves visibility in various conditions, ensuring that you’re seen by others on the road. Transitioning to these modern lighting solutions can significantly enhance your driving experience while making your vehicle stand out with a sleek, contemporary look.
Choosing the Right LED Lights for Your Vehicle Model

When upgrading your vehicle to LED lights, selecting the appropriate type for your specific vehicle model is crucial for optimal performance and safety. LED lights come in various shapes, sizes, and functionalities, making it essential to understand your vehicle’s requirements before making a purchase.
First, consult your vehicle’s owner manual or manufacturer’s website to find detailed specifications regarding light bulb sizes and types compatible with your model. Common categories include headlights, fog lights, and interior lights. Identify the existing bulbs and ensure the LED replacements match their specifications.
Next, consider the intensity and brightness of the LED lights. Measured in lumens, the brightness can significantly impact visibility. Higher lumens may provide better illumination, especially for nighttime driving, but ensure they comply with legal standards to avoid blinding other drivers.
Color temperature is another vital aspect. LEDs typically range from warm white (around 3000K) to cool white (up to 6000K). For driving conditions and preferences, cooler lights offer a modern, daylight-like appearance, while warmer shades may provide a classic look. Choose a color temperature that fits your style and enhances visibility without causing glare.
Additionally, check for features such as adjustable beam patterns or additional bulbs designed for specific functions, like DRLs (Daytime Running Lights) or turn signals. These features can enhance the overall effectiveness of your upgrade.
Lastly, opt for reputable brands known for quality and durability. Research reviews and recommendations to ensure a reliable choice. A well-selected LED upgrade not only improves aesthetics but also enhances road safety and vehicle performance.
Step-by-Step Installation Guide for LED Headlights
Upgrading your vehicle’s headlights to LED lights can enhance visibility while driving at night, improve the aesthetic appeal of your vehicle, and increase energy efficiency. Follow this step-by-step guide to install your new LED headlights easily.
Step 1: Gather Necessary Tools and Materials
Before you start the installation, ensure you have all necessary tools at hand. You will need a flathead screwdriver, a socket wrench, gloves to protect your hands, and your new LED headlights. Check the compatibility of your LED lights with your vehicle model.
Step 2: Prepare Your Vehicle
Park your vehicle on a flat surface and turn off the engine. Disconnect the battery to avoid any electrical problems during the installation process. Make sure you wear gloves to prevent oils from your skin from getting on the light bulbs.
Step 3: Remove the Old Headlights
To access the headlight assembly, open the hood of your vehicle. Depending on your car model, you may need to remove screws or clips holding the headlight assembly in place. Carefully detach the old headlight by pulling it straight out from the assembly. Disconnect the wiring harness by pressing the release tab and pulling it out.
Step 4: Install the LED Headlights
Take your new LED headlights and connect them to the wiring harness. Ensure it fits securely. If required, use the adapters provided with the LED lights for proper compatibility. Gently slide the new LED headlight into the assembly, aligning it correctly.
Step 5: Secure the Headlight Assembly
Once the LED lights are in place, secure the headlight assembly by replacing the screws or clips you removed earlier. Ensure everything is tight to prevent any vibrations while driving.
Step 6: Test the New Lights
Reconnect the battery and turn on your vehicle’s lights to test the new LED headlights. Check if both low and high beams are functioning correctly. Adjust the aim of the lights if necessary, as improper alignment can affect visibility.
Step 7: Complete the Installation
After confirming the LED headlights are working properly, close the hood of your vehicle. Make sure to dispose of the old headlights according to your local regulations. Enjoy the upgraded brightness and style of your new LED lights on the road!
Common Issues and Troubleshooting Tips After Upgrading

After upgrading your vehicle to LED lights, you may encounter some common issues. Understanding these problems and having a few troubleshooting tips on hand can help ensure your new lighting system functions seamlessly.
One common issue is flickering lights. This often occurs due to incompatibility between the LED bulbs and the vehicle’s electrical system. To resolve this, check if your vehicle requires a load resistor or a decoder to balance the electrical load. Installing these components can stabilize the current and eliminate flickering.
An additional problem is the potential for error messages on the dashboard. Some vehicles are not programmed to recognize LED lights because they draw less power than traditional bulbs. This can lead to warning indicators for blown bulbs. To fix this, you might need to install an LED-compatible relay or a capacitor to trick the vehicle’s computer into thinking the original lights are still in place.
Another issue that users face is reduced brightness. This can happen if the LED lights are not of high quality or if they are not correctly installed. Ensure that the bulbs are securely seated in their sockets and consider upgrading to higher-quality LED lights known for their brightness and efficiency.
Lastly, overheating can be a concern. Although LEDs are generally cooler than traditional lights, improper installation or inadequate cooling can lead to overheating. Make sure the bulbs have proper ventilation and consider using heat sinks if necessary to manage the temperature.
By being aware of these common issues and following these troubleshooting tips, you can enjoy the benefits of your new LED lights without persistent problems.
